A tape dispenser should make a simple job easier. You pull the tape, guide it over the edge, and cut. When the dispenser jams, slips, sticks, or stops cutting, even a small task can become frustrating. The good news is that most tape dispenser problems have a clear cause and a simple fix.
A dirty blade, wrong tape size, loose spindle, sticky roller, or poor tape alignment can stop a dispenser from working well. Electric models may also have power, sensor, or feed issues. This guide explains how to find the problem, repair common parts, clean the unit, and know when replacement makes more sense.
Why Is My Tape Dispenser Not Working?
A tape dispenser may stop working because the tape roll is loaded backward, the cutting edge is dirty, or the roll does not fit the spindle. In many cases, old adhesive acts like glue inside the feed path. Dust and small bits of tape can then make the problem worse.
Start with the easiest checks before taking anything apart. Remove the tape roll, look for trapped tape, and test the moving parts by hand. Work slowly. A tape dispenser has a simple design, but a small spring or sharp blade can still cause injury.
Quick Checks Before You Take the Tape Dispenser Apart
First, check that the tape roll is the right size and sits straight. Pull the tape by hand to see if it moves along the guide. Look at the cutter for tape scraps, glue, dust, or bent teeth.
Make sure the base sits flat on the desk if you are using a desktop model. For a packing gun, check that the tension knob is not fully tight. For an electric unit, confirm that the power switch is on and the adapter is firmly connected.
Identify Your Tape Dispenser Type: Desktop, Handheld, Packing, or Heavy-Duty
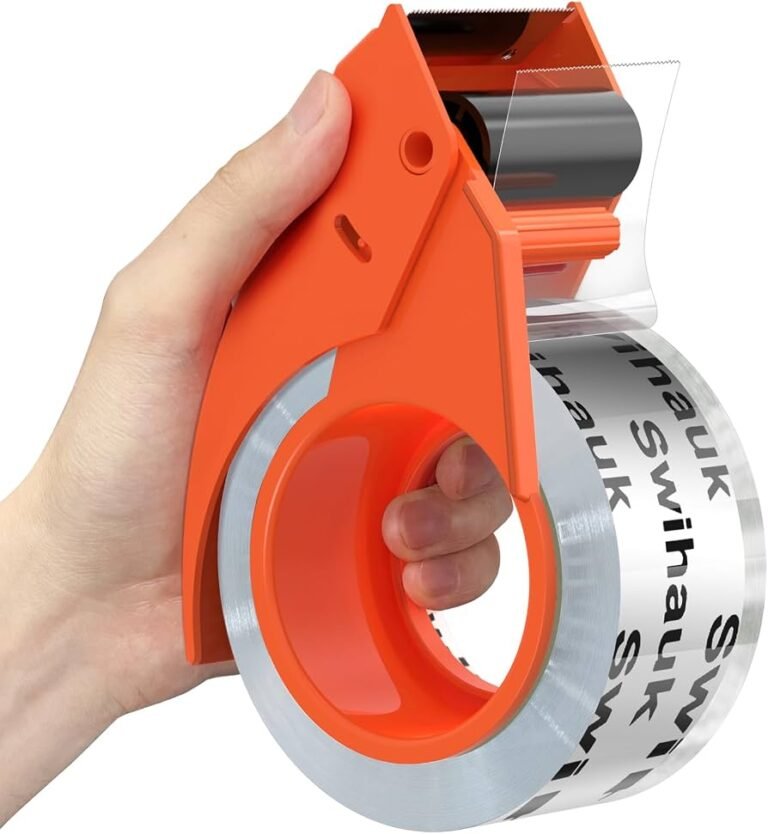
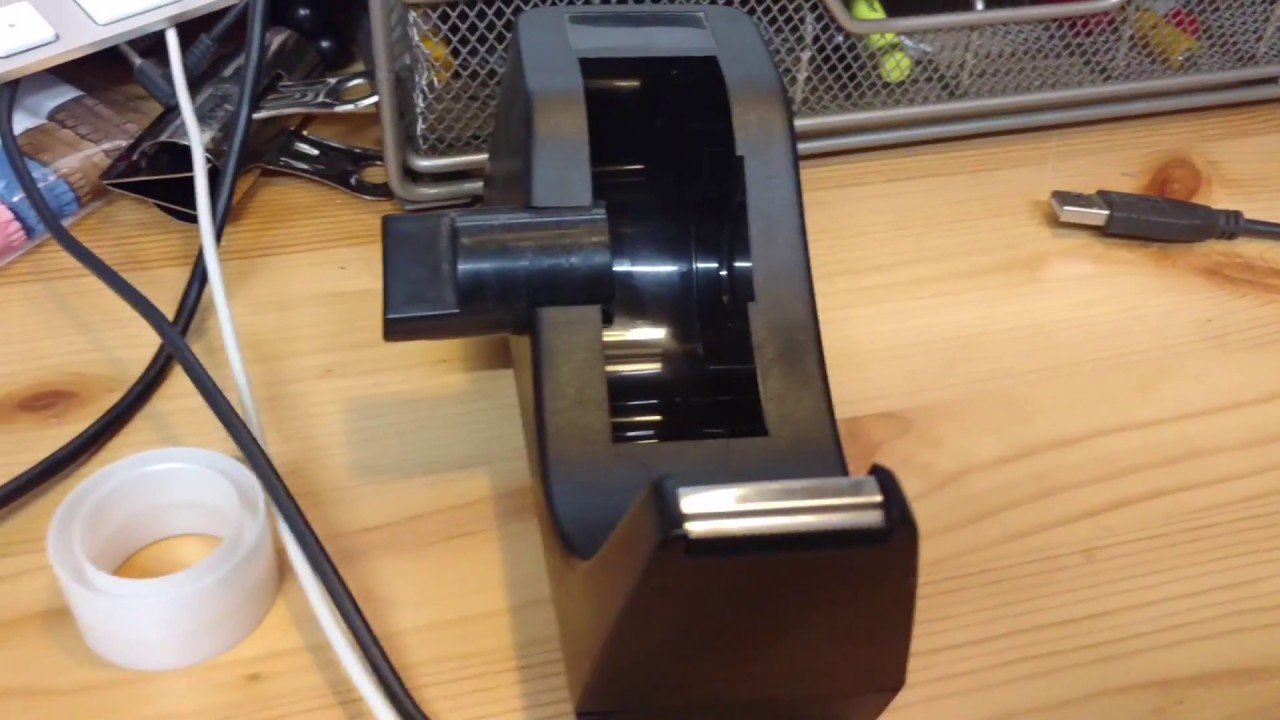
Desktop dispensers use small rolls and often have a weighted base. Handheld models are light and may use a simple blade or sliding cutter. Packing tape guns use a large roll, a feed roller, a tension system, and a serrated blade.
Heavy-duty and industrial models may have metal frames, adjustable brakes, or powered feed systems. The repair steps are similar, but the parts may be stronger and harder to remove. Always follow the maker’s instructions for powered or commercial equipment.
Tools and Supplies You May Need for Repairs
Most repairs need only a few basic supplies:
- A soft cloth or paper towel
- Warm water and mild dish soap
- Isopropyl alcohol
- Cotton swabs
- A small flat screwdriver
- Needle-nose pliers
- A plastic scraper
- Replacement tape or a replacement blade
- Safety gloves and eye protection
Avoid using a knife as a scraper. It can damage plastic and may slip toward your hand. Unplug electric dispensers before cleaning or opening them.

1. Tape Dispenser Not Cutting Tape Properly
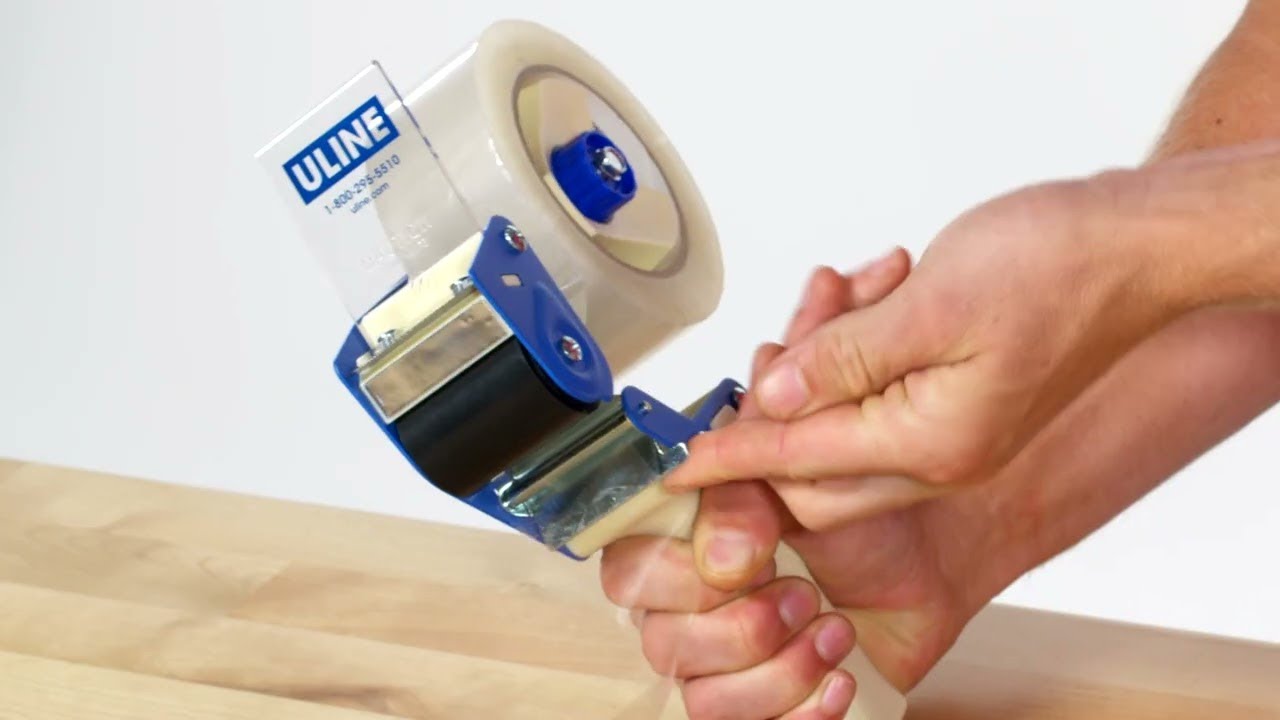
A dispenser that does not cut tape cleanly is one of the most common problems. The tape may stretch, tear unevenly, or stay attached to the roll. This usually points to a dirty, dull, bent, or misaligned cutter.
Why the Tape Cutter Blade Stops Cutting Cleanly
Tape adhesive can coat the cutting teeth. Dust then sticks to the glue and forms a hard layer. This layer makes the blade slide over the tape instead of piercing it.
A blade may also lose its sharp edge after long use. Pulling tape at the wrong angle can bend the cutter or loosen its mount. Thick shipping tape may wear a small office dispenser faster than the dispenser was designed to handle.
How to Clean a Dirty or Sticky Serrated Blade
Remove the tape roll first. Dip a cotton swab in isopropyl alcohol and rub it along the blade teeth. Use short strokes and keep your fingers behind the cutting edge.
For thick residue, let the alcohol sit for one minute. Then loosen the softened glue with a plastic scraper or an old plastic card. Wipe the blade dry before loading tape. Do not soak the entire dispenser, since liquid can reach springs, bearings, or electric parts.
How to Fix a Dull, Bent, or Damaged Tape Dispenser Blade
A slightly bent blade may be moved back into position with needle-nose pliers. Make tiny adjustments. Do not force the metal, because repeated bending can cause it to snap.
Do not file a serrated blade unless the manufacturer allows it. Filing can remove the tooth shape and create a rough edge. If the teeth are rounded, broken, or badly bent, replacement is safer and usually works better.
When to Replace the Cutter Blade or the Whole Dispenser
Replace the blade when the rest of the dispenser is strong and moves well. A new cutter can restore clean cuts at low cost. Use the exact replacement part when possible.
Replace the whole unit when the blade mount is cracked, the base is unstable, or the roller and spindle are also worn. A new blade will not solve a dispenser with several failing parts.
2. Tape Keeps Sticking to the Dispenser Instead of Coming Off
Tape that sticks to the cutter or guide can curl, tear, or leave a short piece behind. This problem often appears in warm rooms, where adhesive becomes softer. It can also happen when the tape is pulled too slowly.
Why Adhesive Builds Up on the Cutter and Tape Guide
Every cut can leave a small amount of glue on the dispenser. Over time, those small amounts join together. The sticky surface catches the next piece of tape like a fly on syrup.
Low-quality tape may leave more residue than a well-made roll. Old tape can also become soft or brittle. If the tape sits near heat or direct sun, its adhesive may spread onto nearby parts.
How to Remove Sticky Tape Residue Without Damaging the Dispenser
Use a cloth with a small amount of isopropyl alcohol on metal parts. Rub gently until the glue lifts. For plastic, test the alcohol on a hidden spot first, because some plastics can become cloudy or weak.
A plastic scraper works well for thick spots. Do not use acetone, paint thinner, or strong solvent unless the manufacturer approves it. These products can melt plastic, remove labels, or damage the finish.
How to Prevent Fresh Tape From Sticking to the Blade
Keep the cutting teeth clean and dry. Pull the tape across the cutter with a firm, smooth motion. A quick pull gives the tape a clean break and reduces stretching.
Use tape made for the dispenser. Some craft and shipping tapes have very strong adhesive and may not release well from small plastic guides. Store the dispenser away from heat and dust.
3. Tape Dispenser Won’t Roll or Feed Tape
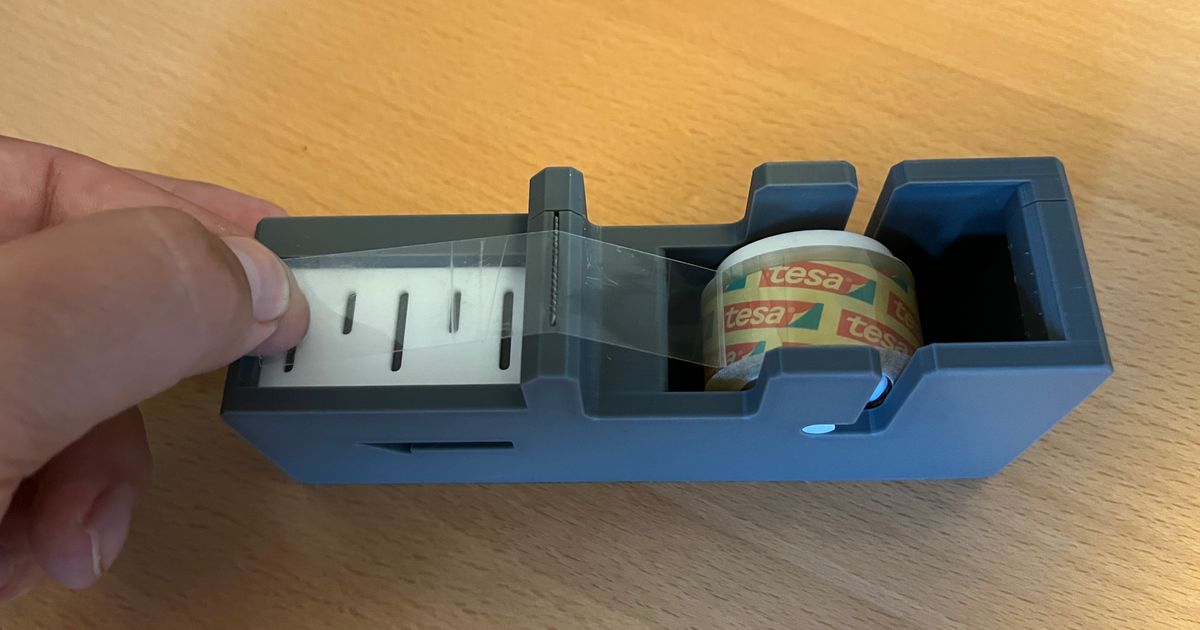
When tape will not roll, the roll may be backward, jammed, too tight, or too wide. The feed path may also contain a folded strip of tape. Remove the roll before trying to force the roller.
Check Whether the Tape Roll Is Installed in the Right Direction
The sticky side should travel in the direction shown by the dispenser’s guide. On most packing guns, the adhesive side faces down as the tape passes under the roller. On desktop models, the tape usually travels over the top toward the cutter.
If the tape comes out with the wrong side facing the surface, remove the roll and turn it around. A reversed roll can feed poorly and may stick to the frame.
How to Fix a Jammed Tape Roll or Stuck Roller
Cut or tear away the damaged part of the tape. Look for a folded edge wrapped around the roller. Pull it out slowly rather than yanking it, since a hard pull can bend the axle.
Rotate the roller by hand. If it does not move, clean the axle area and remove trapped adhesive. Never force a roller with pliers while the tape is still attached.
How to Check the Spindle, Hub, and Tape Feed Path
The spindle should turn freely and hold the roll at its center. Check both ends for dust, cracks, or a missing cap. Make sure the tape does not rub against the side wall.
Follow the full path from the roll to the cutter. The tape should pass over or under each guide in the correct order. Even one skipped guide can create drag and cause a jam.
What to Do When the Tape Roll Is Too Wide or Too Tight
A wide roll may rub against the dispenser frame. A roll with a small core may not fit the spindle. A very tight fit stops the roll from turning smoothly.
Use a roll that matches the dispenser’s width and core size. Do not shave the cardboard core or force a large roll into place. The wrong roll can damage the holder and create poor tension.
4. Packing Tape Dispenser Not Working
Packing tape dispensers, also called tape guns, have more moving parts than desk models. A common issue is incorrect loading. Other causes include a tight brake, a blocked roller, or a blade covered in adhesive.
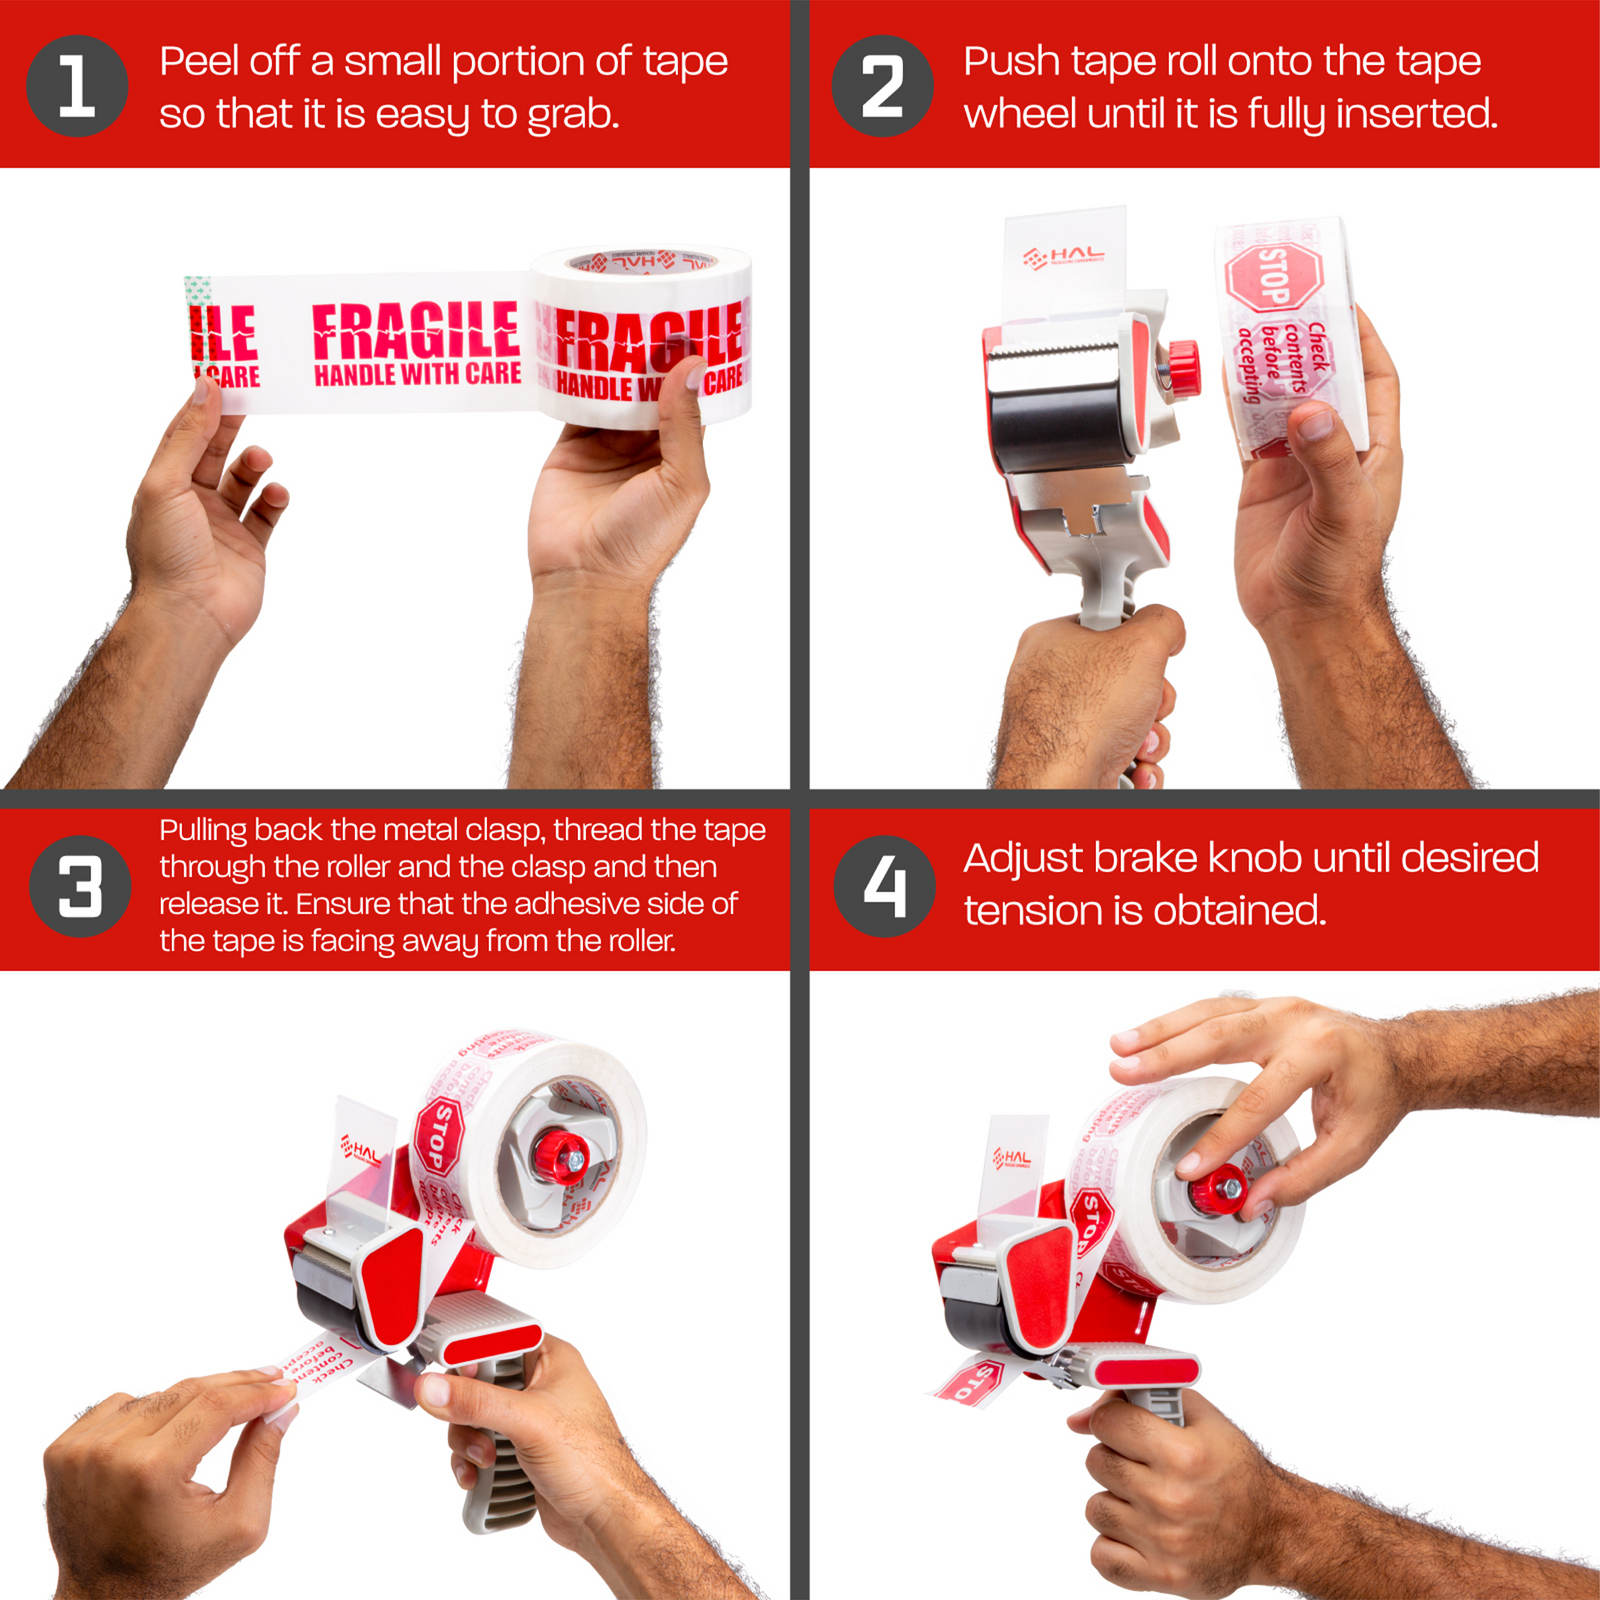
How to Load a Packing Tape Gun Correctly
Place the roll on the spindle with the sticky side facing down as the tape moves toward the front. Pull the tape under the guide roller, then over or around the front roller as shown by the dispenser design.
Leave enough tape extending past the cutter to grip it. Press the tape against a box, pull the gun back, and let the serrated blade cut the tape. If the tape path feels wrong, remove the roll and reload it rather than forcing it.
Why Packing Tape Won’t Feed Through the Roller
A roller may stop because glue, dust, or a torn tape edge is caught around its axle. The tape may also be trapped under the wrong guide. Check whether the roller turns when you move it by hand.
If the roller turns but the tape does not move, the tape may be slipping. Clean the roller and reload the roll with steady tension. Replace a smooth, cracked, or badly worn roller.
How to Adjust the Tension Control on a Packing Tape Dispenser
Many tape guns have a knob that controls roll resistance. Turn the knob clockwise to increase drag and counterclockwise to reduce it. Make small changes and test after each adjustment.
Too much tension makes the tape hard to pull. Too little tension lets the roll spin too fast. The best setting gives smooth feed without slack or sudden stops.
How to Fix a Tape Gun That Pulls Too Much Tape
Reduce the roll’s free spin by tightening the tension knob slightly. Check that the tape is passing over the guide roller and not around the outside of the frame.
Pull the gun in a straight line. A sharp side pull can make the roll coast and release extra tape. If the spindle brake is broken, replace the brake or the entire tape gun.
How to Fix a Tape Gun That Makes a Loud Scraping or Grinding Noise
A scraping sound may come from a roller rubbing against the frame. A grinding sound may point to a worn axle, loose screw, or damaged bearing. Stop using the gun if metal parts are rubbing hard.
Remove the roll and turn each roller by hand. Tighten loose screws, clear debris, and check for bent brackets. Replace parts that wobble or scrape after cleaning.
5. Tape Dispenser Blade Not Retracting or Moving
Some dispensers use a moving cutter that retracts for safety. If the blade stays out, will not move, or feels stiff, the cutter track may be dirty or bent.
Why the Cutter Mechanism Gets Stuck
Glue can enter the sliding track and act like cement. Small tape scraps may also lodge under the cutter. A dropped dispenser may bend the metal frame and stop the cutter from traveling.
Never press hard on a stuck blade. The force may break the spring or send the blade forward without warning.
How to Check for Bent Metal Parts or Loose Screws
Look at the cutter from the side. It should sit straight and move in its guide. Compare the left and right sides if the design has matching rails.
Check screws near the cutter and frame. A loose screw can shift the blade path. Tighten it gently. Over-tightening can strip plastic threads or stop a moving part.
How to Clean and Free a Jammed Cutter Mechanism
Unplug or unload the dispenser first. Brush away dry debris with a soft brush. Use a cotton swab with alcohol on metal sliding surfaces.
Move the cutter a tiny amount at a time. Once it starts to move, clean the track again. Avoid heavy oil near tape, because oil can stain the tape and reduce its grip.
When a Broken Spring or Internal Part Needs Replacement
A cutter that does not return may have a broken spring. A missing pin can also prevent movement. These parts are often small and difficult to match.
If the maker sells a repair kit, use the correct kit. Otherwise, replacement is usually safer than making a homemade spring. A poorly fitted spring can cause the cutter to move too fast.
6. Tape Dispenser Keeps Unrolling Too Much Tape
Extra tape wastes material and makes work messy. The usual causes are low roll tension, a loose spindle, or a brake that no longer grips the roll.
Why the Tape Roll Spins Too Freely
The roll may be smaller than the dispenser expects. A worn spindle cap may also fail to hold the roll. In packing guns, the tension knob may be too loose.
Tape can continue to spin after you stop pulling. This is called freewheeling. It is common when the roll is light or the brake surface is dirty.
How to Adjust Roll Tension Without Blocking the Tape Feed
Turn the tension control in small steps. Pull a short strip after each change. Stop when the roll follows your hand without leaving a loose loop.
Do not tighten the control until the roll locks. Excess drag makes the tape stretch and may cause a tear. Good tension feels like a gentle hand on the roll, not a clamp.
How to Check the Spindle and Brake Mechanism
Remove the roll and inspect the spindle for cracks or wear. The brake pad should touch the roll or hub evenly. A missing washer or cap can create too much space.
Turn the spindle by hand. It should have mild resistance but should not grind. Replace worn brake parts when available.
How to Stop Tape From Unrolling When You Pull It
Pull at a steady speed and keep the tape aligned with the center of the dispenser. Do not jerk the tape from the side. A straight pull helps the brake work correctly.
For a desktop model, use a heavier base or hold the dispenser down. A sliding base can make it seem as if the roll is releasing too much tape.
7. Tape Tears, Splits, or Wrinkles While Dispensing
Tape should leave the roll in a flat strip. Tears, splits, and wrinkles usually come from poor alignment, a damaged edge, or too much tension.
Why Tape Tears Along the Edge
The roll edge may be crushed or cut unevenly. A sharp burr on the spindle or guide can also slice the tape. Tape that has dried out may split more easily.
Check the first few layers of the roll. If they are damaged, remove them and test a fresh layer. Replace the roll if the problem continues.
How to Fix Tape That Folds or Wrinkles on the Roller
Clean the roller and make sure it turns freely. Load the tape so it runs through the center of the guides. Pull the tape with light, even pressure.
Wrinkles often form when one side of the roll moves faster than the other. A crooked roll or bent holder can cause this. Realign the roll before changing other parts.
Check the Tape Width, Core Size, and Roll Alignment
The tape must fit the dispenser’s width. A narrow roll may move from side to side. A wide roll may rub against the frame and fold at the edge.
The core must also fit the spindle. Keep the roll centered. If the dispenser has side collars, adjust them so they touch the roll without squeezing it.
How to Prevent Packing Tape From Splitting During Shipping
Use tape made for shipping and match its width to the tape gun. Keep the roll dry and store it at normal room temperature. Avoid very fast pulls that stretch the tape.
Press the tape flat on the box before cutting. A clean, firm cut reduces a weak split at the end of the strip.
8. Electric or Automatic Tape Dispenser Not Working
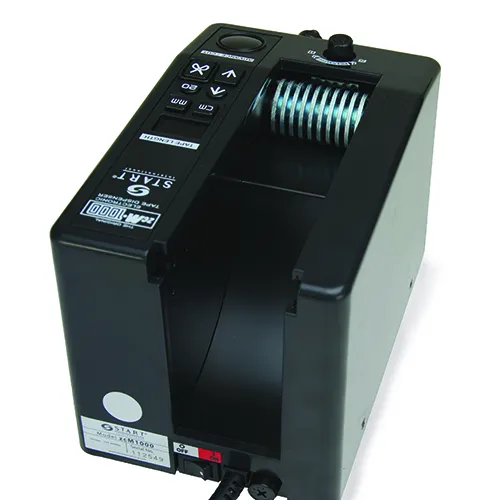
Automatic tape dispensers may measure, feed, and cut tape with buttons or sensors. Their problems can involve the tape path, power system, motor, or control panel.
Why an Electric Tape Dispenser Won’t Turn On
The power switch may be off, or the unit may be in a safety lock mode. Some models will not start unless the cover is fully closed. A blown fuse or failed adapter is also possible.
Turn the unit off before checking the cord. Never open the electrical housing while it is connected to power.
How to Check the Power Cord, Adapter, Battery, or Power Supply
Look for cuts, bent pins, loose plugs, or heat damage. Try a known working outlet if the adapter appears sound. For battery models, charge the battery fully and check its contacts.
Use only the voltage and adapter listed by the manufacturer. A wrong adapter may damage the motor or create a fire risk.
Fixing Tape Feed Errors on Automatic Dispensers
Remove the roll and clear all torn tape from the feed path. Reload the tape according to the diagram. Make sure the adhesive side faces the correct direction.
Check the programmed length and feed mode. A sensor may reject tape if the strip is too short, folded, or not centered.
How to Clean the Feed Roller and Sensor Area
Power off and unplug the dispenser. Use a dry soft brush to remove dust from the sensor area. Clean the feed roller with a lightly dampened cloth.
Do not spray cleaner into the machine. Keep liquid away from circuit boards, switches, and motor openings. Allow all parts to dry before testing.
What to Do When the Dispenser Cuts Tape but Won’t Feed the Next Piece
The motor may be running while the roller slips. Clean the roller and check for a worn rubber surface. The tape may also be loaded under the wrong guide.
If the machine cuts but does not feed after cleaning and reloading, the sensor or drive gear may be faulty. Check the manual for an error reset. Seek service if the fault remains.
9. Tape Dispenser Roller Not Turning
The roller controls tape movement. If it is stuck, dirty, or worn, the dispenser may pull unevenly or stop feeding tape.
How to Tell Whether the Roller Is Jammed or Worn Out
A jammed roller feels blocked and may move after tape scraps are removed. A worn roller may spin but fail to grip the tape. Its surface may look shiny, cracked, or flat.
Turn the roller with the tape removed. Compare its movement with other rollers. A healthy roller should turn smoothly without side-to-side wobble.
How to Remove Adhesive Buildup From the Feed Roller
Wipe the roller with a cloth dampened with isopropyl alcohol. Turn it slowly so you clean the full surface. Use a cotton swab around the axle.
Let the roller dry before loading tape. Wet alcohol can make the surface slippery for a short time. Never scrape a rubber roller with a metal tool.
How to Check Roller Alignment and Axle Movement
The roller should sit straight between its supports. Push it gently from side to side. A small amount of movement may be normal, but a loose axle can cause poor feed.
Look for bent brackets, missing washers, or a screw that has backed out. Correct alignment before adding oil or replacing the roller.
When a Replacement Roller Is Better Than a Repair
Replace the roller when its rubber is cracked, hardened, or smooth. Cleaning cannot restore lost grip. A damaged roller can also pull tape at an angle.
If the roller and axle are molded as one part, replacing the full assembly may be easier. Use a part made for your dispenser model.
10. Tape Dispenser Won’t Hold the Tape Roll in Place
A roll that slips, wobbles, or falls off makes clean dispensing nearly impossible. The holder may be loose, the spindle may be too small, or the tape core may not match.
Why the Tape Roll Slips Off the Spindle
A missing end cap is a common cause. The spindle may also be worn down from repeated use. Some desktop models rely on side arms that can spread or crack.
Check whether the roll moves along the spindle. If it does, the holder is not giving enough side support.
How to Fix a Loose Hub, Missing Cap, or Damaged Holder
Tighten a loose hub if the design allows it. Replace a missing cap with the maker’s part rather than using a sharp improvised object. A smooth plastic washer may work only if it fits safely and does not touch the tape path.
Replace cracked holders. Glue is not a reliable fix for a part under constant turning pressure.
How to Check Whether the Tape Core Fits the Dispenser
Measure the inside diameter of the tape core and compare it with the spindle. The core should slide on without force but should not wobble badly.
A core that is too large needs a suitable adapter. A core that is too small should not be forced onto the spindle, since it can split or jam.
How to Stop the Roll From Wobbling During Use
Center the roll between the side supports. Tighten the holder until the roll is stable but still turns freely. Check that the roll edge is not bent.
Pull from the center line of the dispenser. Side pulls make wobble worse and can cause wrinkles or edge tears.
11. Tape Dispenser Is Stuck, Jammed, or Completely Broken
A jam can happen when tape folds around a roller, wraps around a spindle, or gets caught under the blade. A broken frame or cutter may require a full replacement.
How to Find the Source of a Tape Jam
Remove the roll and inspect each part in order. Start at the spindle, then check the guides, roller, and cutter. Look for a strip that has wrapped behind a wheel.
Use a flashlight for narrow gaps. Do not pull blindly. You may remove the tape but leave a hard piece of adhesive inside.
How to Remove Trapped Tape Without Damaging the Mechanism
Cut the trapped tape into small sections with scissors. Pull each section with tweezers or fingers protected by gloves. Work in the same direction as the tape path.
Soften glue with a little alcohol on a cloth. Keep solvent away from rubber parts and electrical openings. Never pry against a thin plastic guide.
How to Check for Cracked Plastic, Bent Metal, or Broken Parts
Inspect the base, side walls, cutter mount, spindle, and roller brackets. Look for white stress marks in plastic. These marks often show where plastic is about to crack.
Check that metal arms are parallel. A bent arm can make every new roll jam. Replace parts that no longer hold their shape.
When to Repair the Dispenser and When to Replace It
Repair makes sense when the issue is dirt, a loose screw, or a replaceable blade. Replacement is better when the frame is cracked or several parts are worn.
A cheap dispenser may cost less to replace than to repair. A heavy-duty or automatic model may justify professional service.
The Ultimate Guide To Packaging Dispensers: Smart Solutions For Faster Packing
How to Fix a Tape Dispenser Step by Step
A set process prevents missed causes. Do not change several parts at once unless you must. Small tests help you learn which part caused the failure.
Step 1: Remove the Tape Roll and Inspect the Dispenser
Take off the roll and place it on a clean surface. Look for torn tape, glue, dust, and broken pieces. Move the roller and cutter by hand if the design permits.
Keep your fingers away from sharp teeth. If the unit is electric, unplug it before inspection.
Step 2: Check the Blade, Roller, Spindle, and Feed Path
Inspect the cutter for buildup or bent teeth. Spin the roller and spindle. Confirm that no tape is wrapped around an axle.
Follow the tape route from start to finish. Compare it with the printed diagram or product instructions. A wrong path can look like a mechanical failure.
Step 3: Clean Sticky Residue and Remove Trapped Tape
Use alcohol on metal parts and a mild cleaner on safe plastic areas. Remove loose tape with a plastic scraper. Work gently around rubber rollers.
Dry every part before reassembly. Wet surfaces can make tape slip or cause new residue to spread.
Step 4: Reinstall the Tape Roll and Adjust the Tension
Fit the roll on the correct spindle. Center it and load the tape through each guide. Set the tension low at first.
Pull a short strip. Increase tension only if the roll spins too freely. The tape should move in a straight line without stretching.
Step 5: Test the Dispenser With a Short Strip of Tape
Test one short strip before starting a large job. Check the feed, cut, tape edge, and roll movement. Listen for scraping or grinding sounds.
If the test fails, unload the tape and return to the last part you changed. This method often reveals the problem faster than random adjustments.
How to Clean and Maintain a Tape Dispenser
Regular cleaning keeps tape residue from becoming a hard shell. It also helps you spot wear before a small problem becomes a jam.
How Often Should You Clean a Tape Dispenser?
Clean a light-use office dispenser once a month. Clean a busy packing dispenser once a week or whenever residue appears. Automatic units may need more frequent roller and sensor checks.
Clean the blade sooner if cuts become rough. A quick wipe takes less time than removing a large adhesive buildup later.
How to Remove Old Adhesive From Metal and Plastic Parts
Use isopropyl alcohol on a cloth for most metal parts. On plastic, start with warm water and mild dish soap. If that does not work, test a small amount of alcohol in a hidden area.
Let thick glue soften before wiping. Several light passes are safer than one hard scrape.
Which Cleaning Products Are Safe for Tape Dispensers?
Mild soap, warm water, and isopropyl alcohol are common safe choices. Use only a damp cloth near mechanical parts. For electric models, follow the maker’s cleaning directions.
Avoid acetone, bleach, oil, and strong paint solvents. They can damage plastic, rubber, labels, and tape adhesive.
How to Store a Tape Dispenser to Prevent Dust and Adhesive Buildup
Store it in a dry place away from sunlight and heaters. Cover automatic units with a clean dust cover. Keep the cutter free from loose tape scraps.
Do not store a dispenser with a torn tape end pressed against the blade. That end may harden and create a sticky start point.
A Simple Weekly Maintenance Routine for Busy Offices and Packing Stations
Once a week, remove the roll and brush away dust. Wipe the blade, guides, and roller. Check screws, tension, and roll alignment.
Test the dispenser with a short strip. Record repeated problems. A simple log can show when a blade or roller is nearing the end of its useful life.
How to Prevent Tape Dispenser Problems in the Future
Most failures are easy to prevent. Use the right roll, keep the tape path clean, and pull in line with the dispenser.
Choose the Right Tape Width and Roll Core Size
Check the dispenser’s listed tape width and core size. Do not assume every roll will fit. A roll that is close in size may still cause rubbing or wobble.
Buy compatible rolls in bulk only after testing one. This avoids filling your supply shelf with tape that feeds poorly.
Use the Correct Tape Type for Your Dispenser
Desktop dispensers are made for light office tape. Packing guns are made for shipping tape. Craft, masking, duct, and reinforced tapes may need special tools.
Using the wrong tape is like putting a truck tire on a bicycle. It may look possible, but the parts are not made for the same load.
Avoid Pulling Tape at the Wrong Angle
Pull the tape along the dispenser’s center line. Avoid sudden side pulls. A side force can bend the tape, shift the roll, and wear the guide.
For packing, keep the gun flat against the box when applying tape. Use the blade only after the strip is pressed down.
Keep the Cutter Blade Clean and Free From Damage
Wipe the blade before residue becomes thick. Do not cut hard objects, straps, or wire with a tape cutter. Those materials can chip or bend the teeth.
Replace a damaged blade early. A clean cutter protects both the tape and your hands.
Use the Right Dispenser for Home, Office, Crafts, or Shipping
Choose a desktop model for small office jobs. Use a handheld craft dispenser for light work. Pick a packing gun for boxes and shipping tape.
For high-volume work, consider a heavy-duty or automatic model. The right tool reduces strain and prevents repeated jams.
When Should You Replace a Broken Tape Dispenser?
A dispenser does not need to last forever. A worn unit can waste tape, slow work, and create safety risks.
Signs of a Worn-Out Blade, Roller, or Spindle
Replace parts when the cutter stays dull after cleaning, the roller has cracks, or the spindle wobbles. A brake that cannot hold tension is another clear sign.
Repeated jams after correct loading also suggest internal wear. If the same fault returns after cleaning, inspect the main moving parts.
Repair Cost vs. Replacement Cost
A blade or roller may be cheap to replace. A motor, sensor, or molded frame may cost more than a new basic unit. Include your time when comparing repair and replacement.
For a costly professional model, contact the maker or an authorized repair shop. For a low-cost desk dispenser, replacement is often the practical choice.
Features to Look for in a Reliable Replacement Tape Dispenser
Look for a strong base, smooth roller, stable spindle, and replaceable cutter. For packing guns, choose a clear tension control and a comfortable handle.
For automatic models, check feed accuracy, sensor access, power options, and parts support. A good warranty can matter more than a low first price.
Best Replacement Options for Desktop, Packing, and Automatic Tape Dispensers
A weighted desktop dispenser is best for regular office use. A metal-frame packing gun suits frequent box work. An automatic dispenser is useful when many strips of the same length are needed.
Match the replacement to the job, tape width, and daily volume. More features are not always better if they make cleaning or loading harder.
Frequently Asked Questions About a Tape Dispenser Not Working
Why is my tape dispenser not cutting the tape?
The cutter may be dirty, dull, bent, or covered in adhesive. Remove the tape, clean the teeth with a small amount of isopropyl alcohol, and test the blade again. Replace it if the teeth are damaged or rounded.
Why does my tape dispenser keep jamming?
A jam can come from wrong loading, a torn tape edge, adhesive buildup, or a roll that does not fit. Remove the roll and inspect the full feed path. Clear trapped tape before trying to pull more.
Why won’t my packing tape dispenser roll?
The roller may be blocked by glue or tape scraps. The tape may also be loaded around the wrong guide. Remove the roll, clean the roller, check the axle, and reload the tape with the sticky side facing the correct direction.
How do I fix a tape dispenser that keeps sticking?
Clean the cutter and guide with a suitable cleaner. Isopropyl alcohol works well on many metal parts, but test it on plastic first. Store the dispenser away from heat and use tape that matches the tool.
Can I sharpen a tape dispenser blade?
It is usually better not to sharpen a serrated tape blade. Filing can change the tooth shape and make cutting worse. Replace the blade when possible, especially if it is bent, chipped, or badly worn.
How do I remove sticky residue from a tape dispenser?
Start with warm water and mild soap on safe plastic areas. Use isopropyl alcohol on a cloth for many metal surfaces. Avoid acetone and strong solvents unless the manufacturer approves them.
Why does my tape dispenser keep unrolling too much tape?
The roll may spin too freely because tension is low, the spindle is worn, or the brake is damaged. Tighten the tension a little and check the hub. Do not tighten it so much that the tape cannot feed.
Can a broken tape dispenser be repaired?
Many simple problems can be repaired. Cleaning, tightening screws, replacing a blade, or clearing a jam may restore function. A cracked frame, broken motor, or missing internal spring may make replacement more practical.
How long should a tape dispenser last?
A light-use desk dispenser can last for years. A busy packing dispenser may wear sooner, especially with thick shipping tape. Cleaning, correct loading, and proper storage can extend its service life.
Is it better to repair or replace a tape dispenser?
Repair it when the problem is small and parts are available. Replace it when the frame, spindle, roller, and cutter are all worn or when repair costs approach the price of a new unit. Safety should guide the choice.
A tape dispenser problem often looks bigger than it is. Start with the roll, feed path, cutter, roller, and tension. Clean each part, make small adjustments, and test with a short strip.
If the dispenser still fails after those steps, inspect it for cracks, bent parts, or worn internal components. Repair simple faults when it is safe, but replace a damaged unit when repair would be costly or unreliable. A clean, well-matched dispenser should make tape work feel smooth again—not like a daily tug-of-war.